Free Shipping On All Orders Over $10

Smart watch Water Resistance Tips for Swimming, Showers, and Everyday Adventures

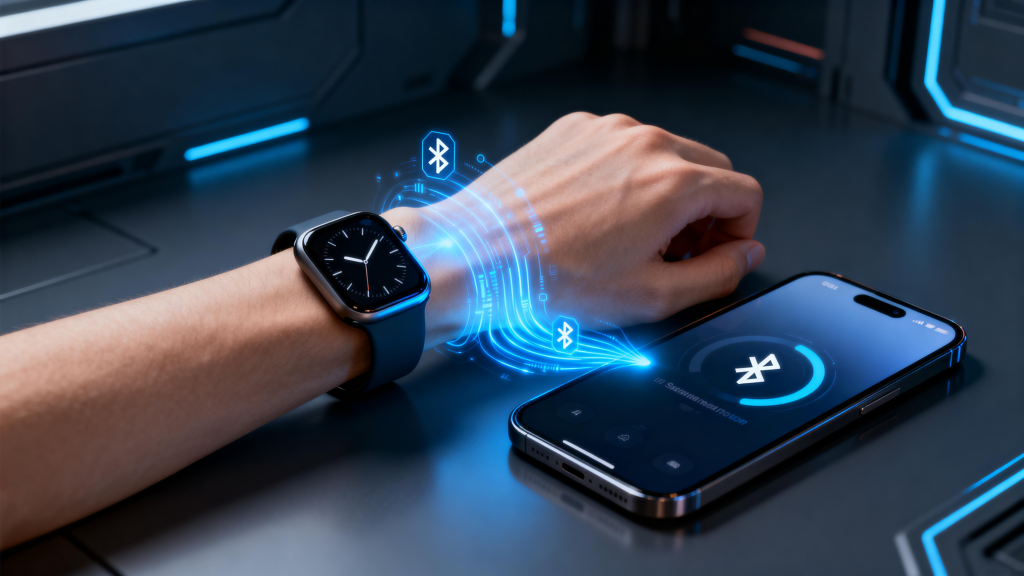
Smart watches have turned into reliable companions for active lifestyles, and water resistance is one of their standout features. From tracking pool laps to surviving unexpected rain showers or salty ocean swims, these devices handle moisture far better than early models ever could. In 2026, flagship options like the Apple Watch Ultra 3 boast 10 ATM ratings with recreational diving certification, Garmin models endure long surface swims with 5-10 ATM, Samsung Galaxy Watches combine IP68 with 5 ATM for versatile use, and Fitbit trackers keep things simple yet effective at 5 ATM.

But water resistance isn’t a free pass to treat your watch like a submarine. Ratings like ATM and IP tell you what the device can handle under test conditions, not real-life abuse. Factors such as soap, temperature changes, chemicals, impacts, and age all degrade seals over time. Misusing your watch can lead to fogged displays, corrosion, muffled speakers, or complete failure.

Understanding Water Resistance Ratings: ATM vs IP Explained

Water resistance gets measured in two main ways: ATM (atmospheres) and IP (Ingress Protection).

ATM ratings indicate pressure tolerance, roughly equivalent to submersion depth in static freshwater tests. One ATM equals about 10 meters of water pressure at sea level.

  • 3 ATM (30m): Handles splashes, rain, handwashing. Not for swimming or submersion.
  • 5 ATM (50m): Safe for swimming in pools or open water, shallow snorkeling, showering (with caveats). Most mainstream smartwatches fall here.
  • 10 ATM (100m): Supports high-speed water sports, deeper surface swimming, some recreational diving (check model specifics).

Higher ratings like 20 ATM appear on dive-focused watches, but few smartwatches reach that.

IP ratings (e.g., IP68) focus on dust and water ingress. The second digit shows liquid protection:

  • IPX7: Submersion up to 1m for 30 minutes.
  • IPX8: Continuous immersion beyond 1m (manufacturer-specified time/depth).

Many smartwatches combine both: Samsung often lists IP68 + 5 ATM, meaning dust-proof and good for swimming, while Apple uses 50m or 100m under ISO 22810:2010 with IP6X dust resistance.

Important reality check: These are lab-tested static pressures. Dynamic activities (swimming strokes, jumps), hot water, soap, chlorine, salt, or drops can reduce effective protection. No consumer smartwatch is truly “waterproof”—they’re water-resistant, and that resistance fades.

Precautions Before Any Water Exposure

Start with these habits to preserve seals longer.

  1. Check Your Model’s Official Rating — Don’t assume. Apple Watch Series 11 and later handle 50m swimming but warn against soap in showers; Ultra models go to 100m with dive support. Garmin Venu/Fenix series typically rate 5-10 ATM for swimming. Samsung Galaxy Watch 7/Ultra combines IP68 + 5-10 ATM. Fitbit Charge/Sense lines sit at 5 ATM. Read the manufacturer’s support page—ratings can change slightly between models.
  2. Inspect for Damage Regularly — Look at the crown, buttons, ports, and speaker grille for cracks or wear. If the screen fogs after moisture or speakers sound muffled, stop water exposure and get it checked. Impacts (dropping on pool deck) compromise seals instantly.
  3. Avoid Extreme Temperatures — Hot showers, saunas, hot tubs, or steam rooms expand materials differently, stressing adhesives and gaskets. Cold plunges after heat can cause contraction cracks. Stick to room-temperature or mildly warm water.
  4. Remove Non-Water-Friendly Bands — Leather, stainless steel mesh, or fabric bands aren’t designed for immersion—swap to silicone, fluoroelastomer, or nylon sport bands before swimming or showering.

Daily Use Tips: Showers, Rain, and Sweat

Many people wear their watch 24/7, including showers. Here’s how to do it safely.

  • Showering: For 5 ATM+ models, it’s usually okay in cool-to-warm freshwater showers. But avoid soap, shampoo, conditioner, body wash—these chemicals degrade seals faster than plain water. Apple explicitly advises against soapy showers for non-Ultra models; even Ultra benefits from rinsing off residue. Rinse thoroughly with fresh water afterward and dry completely.
  • Handwashing and Rain: No issue at all. Quick exposure to splashes or light rain won’t harm anything.
  • Sweat During Workouts: Sweat is salty and acidic—worse than plain water over time. After intense sessions, rinse the watch and band under fresh water, then dry. This prevents corrosion around ports and sensors.

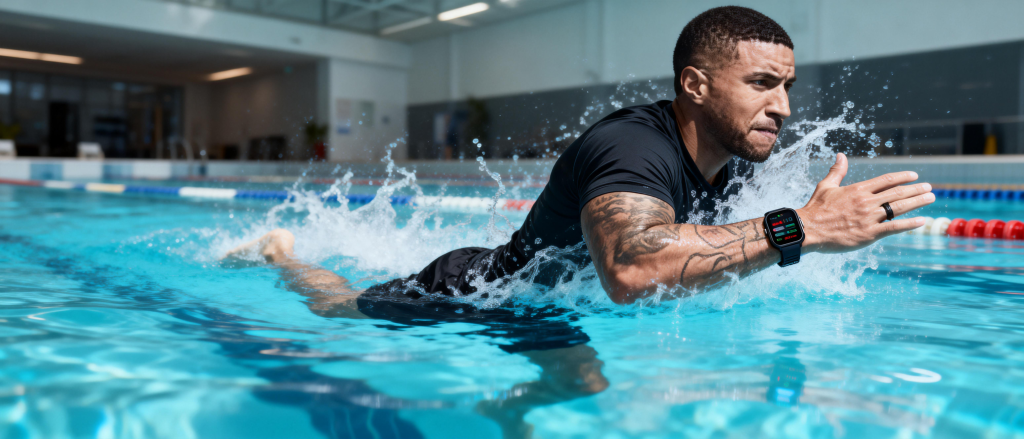
Swimming and Pool Workouts: Making the Most of Water-Lock Features

Swim tracking is a highlight for many users, but follow these steps for accuracy and longevity.

  1. Activate Water Lock Mode — Apple Watch auto-enables it for swim workouts (or manual toggle). It locks the touchscreen to prevent accidental inputs from water. Samsung and Garmin have similar “water mode” or auto-detection. Fitbit often starts swim tracking automatically.
  2. Rinse Before and After — Before pool entry, rinse the watch in fresh water to remove sweat/oils that could mix with chlorine. After swimming, rinse gently under running warm fresh water to clear chlorine, salt, or debris. Chlorine attacks seals; salt corrodes metal parts.
  3. Dry Thoroughly — Pat dry with a lint-free cloth. For speaker ejection: Apple users press/hold Digital Crown to blast water out (makes a satisfying whoosh). Some Garmin models have similar expellers. Let it air-dry fully before charging—moisture in ports causes issues.
  4. Pool vs Open Water — Pools with chemicals need extra rinsing. Ocean swims expose to salt—rinse immediately and dry. Avoid high-velocity activities (water skiing, jet skiing) unless rated for it (e.g., Apple Ultra, some Garmin).
  5. Tracking Tips — Wear snugly for accurate stroke detection. Set correct pool length in the app. Don’t push buttons underwater—Water Lock prevents it anyway.

Advanced Water Activities: Diving, Surfing, and High-Impact Sports

Only specific models handle these.

  • Recreational Diving: Apple Watch Ultra 3 supports up to 40m/130ft per EN13319 standard—great for casual scuba. Garmin dive-capable models (like Descent series) go deeper. Standard 5 ATM watches stop at surface swimming.
  • High-Speed Water Sports: Kitesurfing, wakeboarding, water skiing—look for 10 ATM+ and warnings against high-velocity jets.
  • Precautions: Never expose to sudden pressure changes (e.g., cliff jumping). Rinse after saltwater. Avoid if seals feel compromised.

Maintenance and Long-Term Care

Keep your watch water-ready for years.

  • Regular Cleaning — Weekly, rinse under fresh water, wipe with soft cloth. For bands, remove and wash separately.
  • Avoid Chemicals — No lotions, sunscreens, perfumes near the watch—they seep into seals.
  • Storage — When not worn, store dry and cool. Don’t leave in humid bathrooms long-term.
  • Professional Check — If fogging, corrosion, or malfunction appears, stop water use. Many brands offer water damage diagnostics (often not covered under warranty if misuse suspected).
  • Battery and Charging — Charge dry. Moisture in ports can short circuits.

Common Mistakes That Kill Water Resistance

  • Showering with soap daily—biggest seal killer.
  • Forgetting to rinse after pool/ocean.
  • Wearing during hot tubs/saunas.
  • Charging wet.
  • Ignoring early fogging or muffled audio.
  • Assuming “waterproof” means indestructible.

Swimmers love Apple’s Water Lock and auto-tracking but curse forgetting to rinse chlorine—leading to foggy screens after months. Garmin users on long ocean swims praise durability but stress immediate freshwater rinses to avoid salt buildup. Samsung fans enjoy pool sessions with IP68 but note speaker quality drops if not ejected properly. Fitbit Charge users find 5 ATM plenty for casual laps, with minimal issues when dried after use.

Respect the Limits for Lasting Performance

Your smart watch’s water resistance opens up exciting possibilities—pool workouts, rainy runs, beach days—but it’s not invincible. Understand your model’s rating, rinse religiously after exposure, avoid soaps and extremes, and maintain it diligently. Do that, and it’ll track your swims, monitor heart rate underwater, and survive daily life for years.

Next time you head to the pool or step into the shower, take a second to prep your watch properly.

Smart watch GPS Workouts: Essential Precautions to Stay Accurate, Safe, and Injury-Free

Smart watches have become indispensable for outdoor enthusiasts. Whether you’re pounding pavement on a morning run, pedaling through countryside trails on your bike, or navigating remote hiking paths, the built-in GPS turns your wrist into a reliable navigation and performance tool. In 2026, models from Garmin, Apple, Coros, Suunto, Samsung, and others deliver multi-band GNSS, offline maps, and real-time route tracking that rival dedicated devices from just a few years ago.

But GPS isn’t foolproof. Signal dropouts in dense forests, urban canyons created by skyscrapers, battery drain during long sessions, inaccurate distance readings, and even over-reliance on the device can turn a great workout into frustration—or worse, a safety risk. This guide dives deep into the key precautions every user should take when relying on smartwatch GPS for exercise. We’ll cover setup best practices, environmental factors, battery management, data accuracy tips, safety protocols, brand-specific advice, and common pitfalls with real-world fixes. Follow these steps, and your GPS-tracked workouts will be more trustworthy, enjoyable, and secure.

Understanding How Smartwatch GPS Works in Exercise Mode

Modern smartwatches use GNSS (Global Navigation Satellite System), pulling signals from GPS, GLONASS, Galileo, BeiDou, and QZSS satellites. Higher-end models feature dual-frequency or multi-band reception for better precision, reducing errors from signal multipath (reflections off buildings or trees).

During activities like running, cycling, or hiking, the watch records position every second (or faster in high-accuracy modes), calculates distance, pace, elevation, and route. It pairs this with heart rate, cadence, and power data (if sensors are connected) to give splits, zones, and post-workout analysis.

Despite advancements, challenges persist:

  • Signal blockage from tree canopy, tall structures, or valleys.
  • Multipath errors causing “zigzag” tracks.
  • Cold starts delaying lock-on.
  • Battery consumption spiking with constant high-precision tracking.

Knowing these limitations upfront helps you apply the right precautions.

Pre-Workout Setup Precautions for Reliable GPS Performance

Start strong before you lace up or clip in.

  1. Update Firmware and Maps Regularly — Manufacturers release fixes that improve satellite acquisition and accuracy. For Garmin, sync via Garmin Connect; Apple Watch updates through iPhone; Coros and Suunto use their apps. Download the latest topo or city maps for offline use—essential for remote hikes.
  2. Choose the Right GNSS Mode — Many watches offer options:
    • All-systems + multi-band (most accurate but drains battery fastest).
    • GPS-only (balanced for urban runs).
    • Battery-saver modes (single system, less precise). Use multi-band for trails or races; switch to saver for casual sessions.
  3. Calibrate and Acquire Signal Early — Before starting, go outside to an open area. Let the watch search for satellites for 1-2 minutes. Garmin calls this “GPS lock”; Apple shows a stronger satellite icon. Avoid starting indoors or in tunnels—positioning can lock onto bad data.
  4. Wear It Properly — A snug fit (one finger above wrist bone) helps optical sensors but also keeps the watch stable for consistent GPS antenna orientation. Loose watches can shift, slightly affecting signal.
  5. Enable Relevant Safety Features — Turn on live tracking (share location with contacts via app), incident detection (auto-alerts after falls or crashes), and emergency SOS. Apple Watch Ultra supports satellite messaging in no-coverage zones; Garmin pairs with inReach for two-way texting.

Environmental Precautions: Where GPS Struggles and How to Adapt

Your surroundings dictate GPS reliability more than the watch itself.

  • Avoid or Mitigate Urban Canyons — Tall buildings reflect signals, causing 20-50m errors or jumps. Stick to open streets; use phone-connected GPS as backup if needed.
  • Handle Dense Forests and Tree Cover — Canopy blocks overhead view, leading to under-reported distance or erratic pace. Choose routes with breaks in cover; enable multi-band; accept 5-10% error and focus on perceived effort over exact pace.
  • Watch for Water and Reflective Surfaces — Lakes, rivers, or wet roads bounce signals. Position your arm outward during activities near water.
  • Elevation and Valleys — Deep canyons or mountains reduce visible satellites. Use barometric altimeter (standard on Garmin, Coros) for vertical gain—more reliable than GPS-derived elevation.
  • Indoor or Tunnel Workouts — GPS won’t work. Switch to accelerometer-based indoor run mode; don’t force GPS.

General Rule: Plan routes with open sky exposure. Check satellite forecasts (apps like GPS Status show real-time availability).

Battery Management Precautions During GPS-Intensive Workouts

GPS is power-hungry—expect 30-50% faster drain in tracking mode.

  • Fully charge before long efforts (ultras, multi-day hikes).
  • Disable always-on display, wrist gestures, or notifications during activity.
  • Use low-power GPS modes for non-competitive sessions.
  • Carry a portable charger or power bank for multi-hour adventures.
  • Garmin solar models extend life in sunlight; Apple Ultra lasts 36+ hours with GPS.
  • Monitor battery mid-workout; if low, end tracking early to preserve emergency features.

Accuracy Tips: Making Your Tracked Data More Trustworthy

Even with precautions, expect small errors (typically 1-3% distance on good days).

  • Record at 1-second intervals (Garmin default in high-accuracy).
  • Pair with external sensors (foot pod for running, speed/cadence for cycling) to cross-check GPS.
  • Ignore instant pace in tough signal areas—use average pace or heart rate zones.
  • Post-workout, edit routes in apps (Strava, Garmin Connect) to correct obvious glitches.
  • Compare against known distances (track laps, measured trails) to gauge your watch’s bias.
  • For races, trust course markings over watch distance.

Safety-First Precautions: Don’t Let GPS Replace Common Sense

GPS enhances safety, but over-reliance is dangerous.

  • Always carry a paper map/compass or offline phone backup.
  • Share itinerary and expected return time with someone.
  • Test SOS features before remote trips.
  • In backcountry, enable “breadcrumb” trail recording for retracing steps.
  • For solo activities, use live location sharing.
  • Recognize when to stop trusting the device—dead battery, frozen screen, or bizarre route means switch to intuition and landmarks.
  • Mental health note: Don’t obsess over perfect data; constant checking can increase stress or lead to overtraining.

Brand-Specific GPS Precautions in 2026

Garmin (Fenix 8, Forerunner 970, Enduro 3, Instinct 3) — Leaders in outdoor GPS. Use “All Systems + Multi-Band” for trails; enable SatIQ for auto-switching. Battery lasts days; pair with external inReach for true remote safety. Calibrate altimeter outdoors.

Apple Watch (Ultra 3, Series 11) — Dual-frequency GPS shines in cities. Satellite SOS for emergencies. Low-power mode extends GPS to 12+ hours. Avoid forcing workouts in poor signal—use connected mode with iPhone nearby.

Coros (Vertix 2S, APEX 4, Pace 3) — Exceptional battery (up to 65 hours GPS). Dual-frequency standard. Great for ultras/hiking. Use “Accurate” mode; offline maps downloadable.

Suunto (Vertical, Race S) — Strong maps and altimeter. Multi-band on premium. Good for mountaineering. Charge fully; use FusedTrack for better accuracy in weak signal.

Samsung Galaxy Watch / Fitbit — Solid for urban/casual. Connected GPS often more reliable than standalone. Enable high-accuracy location on phone.

Common GPS Pitfalls and Quick Fixes

  • Zigzag Tracks — Multipath; edit in app or accept minor error.
  • Slow Lock-On — Wait longer outdoors; restart watch if needed.
  • Battery Dies Mid-Workout — Data lost; always start charged, use saver mode.
  • Inaccurate Elevation — Trust barometer over GPS.
  • Over-Reliance on Pace — In bad signal, pace jumps wildly—use effort-based training.

Real-World Examples: Lessons from Users

Trail runners in thick forests often see 5-8% short distances—compensate by running perceived effort. Urban cyclists report better accuracy on multi-band Garmin vs basic smartwatches. Hikers praise satellite SOS on Apple Ultra after getting lost in no-signal zones. One ultra runner switched to Coros for 40+ hour battery, avoiding mid-race shutdowns.

Use GPS Wisely for Better Workouts

Smart watch GPS has revolutionized exercise tracking, offering insights that motivate and guide. But treating it as infallible leads to disappointment or risk. Prioritize setup, understand environment limits, manage battery, verify data, and always have backup plans. With these precautions, your runs, rides, and hikes become safer, more accurate, and truly enjoyable.

The Complete 2026 Guide to Changing Smart watch Bands Like a Pro

Smart watch bands are the easiest way to make your device feel brand new without spending hundreds on a new model. In 2026, the ecosystem is more diverse than ever: quick-release systems on Apple Watch Series 11 and Ultra 3, proprietary but versatile Garmin QuickFit connectors, Samsung’s Galaxy Watch magnetic push buttons, Fitbit’s slim clip mechanisms, Google Pixel Watch’s flush magnetic links, Huawei’s rotating crown releases, and dozens of third-party options that fit most standards. Whether you want a leather strap for office days, silicone for sweaty workouts, titanium Milanese for elegance, or a bright nylon for summer runs, swapping bands takes under 30 seconds once you know the technique.

But it’s not always intuitive. Wrong pressure can scratch the lugs, misaligned pins can jam, and forcing a non-compatible band can damage the watch body or make the connection loose enough to lose during a sprint.

Why Band Swaps Matter More

Bands aren’t just cosmetic anymore. They directly affect:

  • Comfort during long wear (especially sleep tracking)
  • Sensor accuracy (too loose = poor optical HR and SpO2 readings)
  • Activity performance (sweat-wicking silicone vs slippery leather during runs)
  • Style versatility (one watch, multiple personalities for work, gym, formal events)
  • Durability (saltwater corrodes metal bands faster than fluoroelastomer)

A single bad fit can make heart-rate data unreliable or cause the watch to slip during a HIIT session. Getting the swap right keeps everything accurate and comfortable.

Understanding the Main Connector Types

Most modern smartwatches use one of these systems:

  1. Apple Watch Spring-Bar Quick-Release 38/40/41/42/44/45/46/49/50/51 mm sizes; two spring-loaded bars slide into recessed lugs. Ultra models use the same but with wider 49/51 mm compatibility.
  2. Garmin QuickFit / Quick Release 20 mm, 22 mm, 26 mm widths. Spring pins with a small release tab on the band end.
  3. Samsung Galaxy Watch Push-Button / Magnetic Galaxy Watch 4–8 series use a dual push-button release on the band side; Ultra models add magnetic alignment.
  4. Fitbit Clip / Slide Mechanism Charge 6, Sense 2, Versa 4 use a simple slide-and-click; older models had proprietary clips.
  5. Google Pixel Watch Magnetic Flush Magnetic pins with a release button; very slim profile.
  6. Huawei / Xiaomi / Other Android Brands Often 20/22 mm standard spring bars or proprietary quick-release similar to Garmin.
  7. Third-Party Universal Many aftermarket bands use 20/22 mm spring bars or adapters for Apple/Garmin compatibility.

Step-by-Step: Changing an Apple Watch Band

The most common system, so we start here.

  1. Lay the watch face-down on a soft cloth — Protects the crystal from scratches.
  2. Locate the two small release buttons on the back of the watch, right where the band meets the case (one per side).
  3. Press and hold the button on one side while gently sliding the band sideways (toward the edge of the watch).
  4. Slide until it pops free — No force needed; if it resists, double-check you’re pressing the correct button.
  5. Repeat on the other side.
  6. Align the new band — Make sure the curved end faces the correct direction (most bands have a slight curve for wrist fit).
  7. Slide in until you hear/feel a click — The spring bar should snap into the lug recess.
  8. Tug gently to confirm it’s secure.

Pro tips:

  • If the button feels stuck, clean the area with a microfiber cloth (no liquids near the watch body).
  • For Milanese or link bracelets, ensure the magnetic/locking mechanism is aligned.
  • Ultra models have slightly wider lugs—double-check compatibility.

Changing a Garmin QuickFit Band

Garmin’s system is one of the easiest and most reliable.

  1. Flip the watch over.
  2. Locate the small metal tab on the band near the lug (it’s usually silver and flush).
  3. Press the tab inward with your thumbnail or a small tool (no sharp objects).
  4. While pressing, slide the band sideways off the pin.
  5. Repeat for the other side.
  6. New band: align the slot over the pin, press the tab if needed, and slide until it clicks.

QuickFit bands are interchangeable across 20/22/26 mm Garmin models (Fenix, Epix, Instinct, Venu, etc.).

Samsung Galaxy Watch Band Swap

Newer models (Watch 6–8 / Ultra) use a push-button system.

  1. Turn watch face-down.
  2. Find the two small release buttons on the band itself (not on the watch case).
  3. Press both buttons simultaneously (thumb and finger).
  4. Slide the band straight out (no twisting).
  5. New band: align the grooves, press buttons if needed, and push until it clicks.

Ultra models have a slightly wider connector—check band markings.

Fitbit & Google Pixel Watch

Fitbit Charge 6 / Sense 2 / Versa 4:

  1. Locate the small metal clip on the underside of the band near the case.
  2. Slide the clip sideways while pulling gently.
  3. New band: slide in until it snaps.

Pixel Watch 3:

  1. Press the small release button on the side of the band connector.
  2. Slide band off.
  3. Magnetic alignment makes re-attachment foolproof—push until it snaps.

Huawei / Xiaomi / Generic 20–22 mm Bands

Most use standard spring bars.

  1. Use a spring bar tool (cheap online, or carefully use a small flathead screwdriver wrapped in tape to avoid scratches).
  2. Compress the spring bar by pushing from one side while lifting the band.
  3. Slide out.
  4. Reverse for new band — compress, insert, release.

Cleaning & Maintenance After Every Swap

  • Wipe the lugs and connectors with a dry microfiber cloth.
  • If sweat or salt buildup is visible, use a slightly damp cloth (water only) and dry immediately.
  • For metal bands, polish with a jewelry cloth to prevent tarnish.
  • Check pins/spring bars for bending or wear—replace if loose.

Compatibility Quick Reference (2026)

  • Apple Watch (all current models): Only Apple or MFi-certified quick-release bands.
  • Garmin: QuickFit 20/22/26 mm interchangeable across most models.
  • Samsung Galaxy Watch 4–8: Proprietary, but many third-party adapters exist.
  • Fitbit Charge 6: Proprietary clip; limited third-party.
  • Pixel Watch 3: Proprietary magnetic; growing third-party support.
  • Universal 20/22 mm spring bars: Fit many Android brands (Huawei, Xiaomi, Amazfit, etc.) with adapters.

Common Mistakes & How to Avoid Them

  • Forcing a band → scratches lugs or breaks pins. Always press release fully.
  • Wrong size → loose fit ruins HR accuracy. Measure lug width (20 mm, 22 mm, etc.).
  • Ignoring direction → curved bands installed backward feel awkward.
  • Skipping cleaning → sweat/salt corrosion seizes connectors.
  • Cheap no-name bands → poor spring tension causes slipping during activity.

User Stories & Pro Tips from 2026

  • Triathletes love Garmin QuickFit swaps: silicone for swim/run, nylon for bike comfort—all in under 20 seconds between disciplines.
  • Office workers with Apple Ultra: switch to Milanese loop Friday evening, back to Ocean band for weekend training.
  • Casual users on Galaxy Watch: magnetic push buttons make daily outfit changes effortless.
  • Budget-conscious Huawei owners: 22 mm universal bands from Amazon fit perfectly after one adapter purchase.

Make Band Swapping a Habit

Your smart watch is one device with infinite looks and functions—bands are the fastest, cheapest way to keep it fresh. Master the swap process for your model, keep a small rotation (gym silicone, office leather, formal mesh), and clean connectors regularly. In minutes you can go from workout beast to boardroom polished without buying a new watch.

Next time you feel bored with your current setup, grab a new band and swap. Thirty seconds later, it’s a completely different experience on your wrist.

Unlocking the Full Potential of Your Smart watch

In today’s fast-paced world, staying on top of your health has never been easier—or more stylish—thanks to smart watches. These compact devices strapped to your wrist go far beyond telling time; they’re like personal health coaches, tracking everything from your heart rate to your sleep patterns and even alerting you to potential issues before they become serious. If you’ve ever wondered how to get the most out of those health features on your smartwatch, you’re in the right place.

Why Health Features on Smart watches Matter More Than Ever

Smartwatches have evolved from novelty gadgets to essential tools for proactive health management. Remember when fitness trackers were just glorified pedometers? Now, they’re equipped with sensors that monitor vital signs in real-time, offering insights that could once only be gleaned from a doctor’s office. Heart rate tracking, for instance, isn’t just about counting beats during a run—it’s about spotting irregularities that might signal stress, overtraining, or even conditions like atrial fibrillation.

The rise of these features comes at a perfect time. With sedentary lifestyles on the upswing and chronic issues like heart disease affecting millions, having data at your fingertips empowers you to make informed choices. Studies from places like the Mayo Clinic highlight how wearables can motivate better habits, from increasing daily steps to improving sleep hygiene. But here’s the catch: many users never fully enable or understand these tools. That’s where this guide comes in. By the end, you’ll know how to activate them, interpret the data, and integrate it into your routine for real results.

Common Health Features on Smart watches and How They Work

Before we get into setup, let’s break down the most popular health features you’ll find on modern smartwatches. These aren’t just bells and whistles; they’re backed by advanced sensors like optical heart rate monitors, accelerometers, and even electrocardiogram (ECG) capabilities on higher-end models.

  1. Heart Rate Monitoring: This is the foundation of most health tracking. Using green LED lights and photodiodes, the watch measures blood flow under your skin to calculate your beats per minute (BPM). It’s useful for workouts, but also for resting heart rate (RHR), which can indicate overall fitness levels—a lower RHR often means better cardiovascular health.
  2. Sleep Tracking: Smartwatches use motion sensors and heart rate data to analyze your sleep stages (light, deep, REM) and quality. Some, like those from Garmin, even factor in blood oxygen levels to detect issues like sleep apnea.
  3. Blood Oxygen (SpO2) Monitoring: This measures oxygen saturation in your blood, helpful for detecting altitude sickness, respiratory issues, or even early signs of conditions like COVID-19. It uses red and infrared lights to gauge how much oxygen your red blood cells are carrying.
  4. Step and Activity Tracking: Beyond counting steps, this includes calorie burn estimates, floors climbed, and active minutes. It’s great for meeting daily goals like 10,000 steps.
  5. ECG and Irregular Heart Rhythm Detection: Available on premium models, this lets you take a quick electrocardiogram by touching the watch’s crown or bezel, checking for arrhythmias.
  6. Stress and Recovery Metrics: Features like heart rate variability (HRV) assess your body’s stress levels and readiness for exercise. Garmin’s Body Battery, for example, gives a score out of 100 to show your energy reserves.
  7. Fall Detection and Emergency SOS: Sensors detect sudden falls and can automatically call for help, a lifesaver for older users or those with medical conditions.
  8. Blood Pressure and Body Composition: Newer models from Samsung include bioelectrical impedance analysis (BIA) for body fat percentage and skeletal muscle mass, while some offer blood pressure estimates (though often requiring calibration with a cuff).

These features vary by brand and model, but they’re all designed to give you actionable insights. Now, let’s talk about how to enable them.

Enabling Health Features on Apple Watch

Apple Watch is a powerhouse for health tracking, especially if you’re in the iOS ecosystem. Models like the Series 9 or Ultra 2 come packed with features, but you need to set them up properly.

Start by ensuring your watch is paired with your iPhone via the Watch app. Open the app, go to My Watch > General > Software Update, and make sure everything’s current—many health features require the latest watchOS.

  • Heart Rate and ECG: These are on by default, but to use ECG, open the Health app on your iPhone, tap Browse > Heart > Electrocardiogram (ECG) > Set Up ECG App. On the watch, open the ECG app, hold your finger on the Digital Crown for 30 seconds. For irregular rhythm notifications, enable them in the Heart section of the Health app.
  • Blood Oxygen: In the Watch app, go to My Watch > Blood Oxygen > Enable. On the watch, open the Blood Oxygen app and keep still for 15 seconds. Note: This works best at rest and isn’t for medical diagnosis.
  • Sleep Tracking: Set up a sleep schedule in the Health app under Sleep. Wear your watch to bed, and it’ll automatically track stages. For advanced insights like respiratory rate, enable Sleep Focus mode.
  • Fall Detection: In the Watch app, go to My Watch > Emergency SOS > Fall Detection > Always On. It’s smart enough to differentiate between a workout tumble and a real fall.
  • Vitals App (New in watchOS 11): This aggregates overnight metrics like heart rate, temperature, and oxygen. Just wear it while sleeping, and check the app in the morning.

Pro tip: For accuracy, wear the watch snugly about an inch above your wrist bone. If you’re over 55 or have a history of falls, Apple recommends always-on fall detection.

Enabling Health Features on Samsung Galaxy Watch

Samsung’s Galaxy Watch series, like the Watch 6 or Ultra, integrates seamlessly with Android phones via the Samsung Health app. It’s particularly strong in body composition and sleep coaching.

First, download the Samsung Health and Galaxy Wearable apps from the Google Play Store. Pair your watch, and update firmware if prompted.

  • Heart Rate and ECG: Open Samsung Health on your phone, tap the heart icon, and enable continuous monitoring. For ECG, go to the watch’s app list, open ECG, place your finger on the top button, and hold for 30 seconds. Enable irregular heart notifications in Settings > Health > Heart > Irregular Rhythm.
  • Blood Oxygen and Blood Pressure: In Samsung Health, go to Settings > Accessories > Watch > Health Monitors. Enable SpO2 during sleep or on-demand. For blood pressure (available on select models), calibrate with a traditional cuff first via the app.
  • Sleep Tracking: Wear the watch to bed; it auto-detects sleep. For detailed coaching, enable Sleep Coaching in the app, which analyzes patterns and suggests improvements.
  • Body Composition: Open the Samsung Health app on the watch, select Body Composition, place two fingers on the buttons, and stand still. It measures fat, muscle, and water.
  • Fall Detection: In the Galaxy Wearable app, go to Watch Settings > Safety and Emergency > Hard Fall Detection > Always On.

Samsung’s AI-powered Energy Score combines data from sleep, activity, and HRV to give a daily wellness rating—enable it in the app for personalized tips.

Enabling Health Features on Fitbit

Fitbit, now under Google, excels in user-friendly tracking with devices like the Versa 4 or Charge 6. It’s great for beginners and focuses on holistic wellness.

Install the Fitbit app on your phone, create an account, and pair your device.

  • Heart Rate and ECG (on premium models): Heart rate is always on. For ECG, open the ECG app on the watch, hold the corners or sides, and wait 30 seconds. Enable AFib notifications in the app under Heart Rhythm Assessments.
  • SpO2 and Skin Temperature: In the Fitbit app, go to Today > Health Metrics > Enable SpO2 during sleep. Skin temp varies by model but tracks overnight changes for illness detection.
  • Sleep Tracking: Just wear it to bed. The app provides a Sleep Score out of 100, breaking down stages. Premium subscribers get deeper insights like Sleep Profile.
  • Stress Management: Enable EDA scans on models like Sense 2—place your palm over the watch face for 2-7 minutes to measure sweat responses.
  • Active Zone Minutes: This tracks time in fat-burn, cardio, or peak zones based on heart rate. Set it up in the app under Exercise > Goals.

Fitbit Premium ($9.99/month) unlocks advanced features like Daily Readiness Score, which uses HRV and sleep to advise on workout intensity.

Enabling Health Features on Garmin

Garmin is the go-to for athletes, with rugged watches like the Venu 3 or Forerunner series offering in-depth metrics.

Download the Garmin Connect app, pair your watch, and sync.

  • Heart Rate and Pulse Ox: Enable continuous monitoring in the app under Device > Sensors > Heart Rate > On. For Pulse Ox, go to Sensors > Pulse Ox > All Day or During Sleep.
  • Sleep Tracking: Auto-detected when worn to bed. Garmin’s advanced sleep widget includes respiration and HRV for a comprehensive score.
  • Body Battery and HRV: These are on by default. Body Battery estimates energy levels; check it on the watch glance. HRV Status requires consistent tracking for training readiness insights.
  • Respiration Rate and Stress: Enable in the app under Health Stats. Stress tracking uses HRV; do guided breathing sessions on the watch for relief.
  • Women’s Health Tracking: For cycle or pregnancy tracking, set it up in Garmin Connect under User Profile > Health & Wellness.

Garmin’s Training Status uses VO2 max estimates (from heart rate data) to show if you’re improving or overreaching—enable workouts to get accurate reads.

The Benefits of Using Smart watch Health Features

Enabling these tools isn’t just about data collection; it’s about transforming your health. Let’s explore the perks based on real-world impacts.

First, motivation skyrockets. A study from the American Heart Association found that wearable users increase daily activity by up to 2,000 steps, reducing risks for obesity and heart disease. Heart rate tracking helps optimize workouts—staying in the right zones burns fat efficiently or builds endurance.

Sleep insights are game-changers. Poor sleep links to everything from weight gain to weakened immunity. By tracking patterns, you can adjust habits like cutting caffeine, leading to better energy and mood. Garmin users often report improved recovery, while Fitbit’s scores encourage consistent bedtimes.

Early detection saves lives. ECG features have alerted users to AFib, prompting doctor visits. Blood oxygen monitoring caught low levels in COVID patients early. Fall detection provides peace of mind for seniors or solo hikers.

Stress management features promote mental health. HRV tracking reveals when you’re burned out, encouraging rest days. Samsung’s sleep coaching has helped users reduce insomnia symptoms by 20-30%, per user reviews.

Overall, these devices foster preventive care. Mayo Clinic research shows wearables encourage healthier eating and hydration by tying data to apps like MyFitnessPal. For chronic conditions like diabetes, activity tracking aids blood sugar control.

But benefits extend beyond individuals. Sharing data with doctors via apps like Apple Health or Samsung Health streamlines appointments, leading to better diagnoses.

Tips for Maximizing Health Tracking Accuracy and Effectiveness

To get reliable data, follow these practical tips:

  1. Wear It Right: Position the watch snug but not tight, about a finger’s width above your wrist bone. Clean sensors regularly to avoid dirt buildup.
  2. Calibrate When Needed: For blood pressure or body comp on Samsung, use a cuff or scale for initial setup. Garmin’s VO2 max improves with GPS-tracked runs.
  3. Sync with Apps: Integrate with third-party tools like Strava for runs or Google Fit for aggregated data. This gives a fuller picture.
  4. Track Consistently: Wear it 24/7 for best insights, especially sleep and HRV. Charge during showers to minimize downtime.
  5. Set Realistic Goals: Use features like Apple’s rings or Fitbit’s Active Zones to aim for progressive improvements, not perfection.
  6. Monitor Trends, Not Snapshots: A single high heart rate reading might be stress; look at weekly averages for true insights.
  7. Combine with Lifestyle Changes: If sleep tracking shows poor REM, try a cooler room or meditation. For low energy scores, prioritize nutrition.
  8. Privacy First: Review app permissions—share only what you’re comfortable with.
  9. Update Regularly: Firmware fixes bugs and adds features, like Apple’s new Vitals app.
  10. Consult Pros: These aren’t medical devices; use data to inform, not diagnose. Share with your doctor for context.

By applying these, you’ll turn raw data into meaningful habits.

Comparing Health Features Across Popular Brands

Choosing a smartwatch often boils down to which health features suit your needs. Here’s a side-by-side look:

  • Apple Watch: Best for seamless iOS integration and safety (fall/crash detection). Excels in ECG, blood oxygen, and new hypertension alerts. Sleep tracking is solid but lacks Garmin’s depth. Battery life: 18-36 hours. Price: $399+.
  • Samsung Galaxy Watch: Android champ with unique body comp and blood pressure. AI Energy Score and sleep coaching stand out. ECG and SpO2 are robust. Battery: 2-3 days. Price: $299+.
  • Fitbit: Affordable and beginner-friendly. Strong on stress (EDA) and sleep scores. Daily Readiness is premium but valuable. Battery: 6-7 days. Price: $149+.
  • Garmin: Athlete-focused with superior recovery metrics (Body Battery, HRV Status). Pulse Ox and respiration are always-on. Battery: 7-14 days. Price: $299+.

Apple leads in app ecosystem, Samsung in innovation, Fitbit in value, Garmin in endurance sports. All have accurate heart rate (per tests against chest straps), but Garmin edges out for GPS precision during runs.

If you’re iPhone-only, go Apple. Android users: Samsung or Fitbit. Runners: Garmin.

Potential Drawbacks and How to Overcome Them

No tech is perfect. Battery drain from constant monitoring can be an issue—toggle off unused features. Accuracy varies; optical sensors struggle with tattoos or dark skin—use chest straps for precision workouts. Data overload might cause anxiety; focus on trends.

Overcome by starting slow: Enable one feature at a time. Remember, these complement, not replace, professional advice.

Take Control of Your Health Today

Smart watches are more than gadgets; they’re gateways to better living. By enabling features like heart rate monitoring, sleep tracking, and ECG, you’re investing in longevity. Whether you pick Apple for polish, Samsung for smarts, Fitbit for simplicity, or Garmin for grit, the key is consistent use.

Master Your Workouts: The Ultimate Guide to Smart watch Sports Modes

Smart watches have transformed how people approach exercise. What started as basic step counters has evolved into sophisticated training companions that track dozens of activities with precision. In 2026, leading models from Apple, Samsung, Garmin, Fitbit (now deeply integrated with Google), and others offer specialized sports modes that go beyond simple counting. These modes adjust sensors, display relevant metrics, and provide real-time feedback tailored to running, cycling, swimming, strength training, yoga, or multisport events like triathlons.

Whether you’re training for a marathon, hitting the gym regularly, or just staying active with weekend hikes, understanding how to use these sports modes can elevate your performance and keep you motivated. This in-depth guide covers setup, key features, brand-specific instructions, tips for accuracy, comparisons, and real-world benefits. By the end, you’ll know exactly how to squeeze every ounce of value from your watch during workouts.

Why Sports Modes Are a Game-Changer for Fitness Enthusiasts

Sports modes aren’t just labels on a screen—they’re intelligent profiles that optimize how your watch collects and presents data. For example, in running mode, the watch prioritizes pace, distance via GPS, heart rate zones, and cadence. In swimming mode, it switches to stroke detection and lap counting without relying on GPS (which doesn’t work underwater).

Modern smartwatches use a combination of built-in GPS (or connected GPS via phone), optical heart rate sensors, accelerometers, gyroscopes, altimeters, and sometimes barometers to deliver accurate stats. Many now include AI-driven coaching, recovery insights, and post-workout analysis.

The payoff is huge: better training decisions, injury prevention through recovery metrics, and motivation from seeing progress. Users who actively use sports modes often report sticking to routines longer because the data feels personal and actionable. With battery life improving and more modes added yearly—some watches now exceed 100—there’s almost no activity left untracked.

Common Sports Modes and What They Track

Here’s a breakdown of popular modes found across brands:

  • Running/Outdoor Run: GPS distance, pace (current/average), heart rate zones, elevation gain, cadence, ground contact time (on advanced models).
  • Indoor Run/Treadmill: Accelerometer-based distance, pace, heart rate—no GPS needed.
  • Cycling/Outdoor Bike: Speed, distance, elevation, power estimates (if paired with sensors), cadence.
  • Swimming/Pool Swim: Stroke type/count, SWOLF efficiency, laps, pace per 100m, drill logging.
  • Strength Training/HIIT: Rep counting (auto on some), heart rate zones, active time vs rest.
  • Yoga/Pilates: Duration, heart rate variability for calm focus, sometimes guided breathing.
  • Hiking/Trail Run: GPS route mapping, elevation, compass, offline maps on premium models.
  • Multisport/Triathlon: Seamless transitions between swim-bike-run, auto mode switching.
  • Golf: Hole distances, shot tracking (with compatible apps/sensors).
  • Other Niche Modes: Skiing (vertical drop), rowing, boxing, dance, even meditation or breathwork.

Extra perks in 2026 include auto-detection (the watch starts tracking when it senses activity), customizable data screens, and integration with apps like Strava, TrainingPeaks, or Nike Run Club.

Setting Up and Using Sports Modes on Apple Watch (Series 11, Ultra 3, SE 3)

Apple Watch remains the go-to for iPhone users, with a clean Workout app that supports dozens of modes.

To start:

  1. Open the Workout app (icon with running figure).
  2. Scroll or use the Digital Crown to find your activity—favorites appear at the top.
  3. Tap to begin; a 3-second countdown starts (tap “Go” to skip).
  4. During workout: Swipe right for controls (pause, end, lock), swipe left for music/podcast controls.
  5. Customize views: In the Watch app on iPhone > Workout > Workout Views, add/remove metrics like heart rate zones, rolling pace, elevation.

Key modes and tips:

  • Outdoor Run: Uses built-in GPS (Ultra models have dual-frequency for better accuracy in cities/forests). Enable Low Power Mode for longer sessions.
  • Indoor Run: Calibrates with outdoor runs for better accuracy.
  • Swim: Water lock auto-activates; eject water by turning Digital Crown.
  • Multisport: New in recent watchOS—tracks transitions automatically for triathlons.
  • Workout Buddy (watchOS 26+): AI voice coach gives real-time pep talks or pace cues.

Post-workout: Check rings closure, detailed splits in Fitness app on iPhone. Syncs to Apple Health for third-party apps.

Pro tip: For advanced running, add third-party apps like WorkOutDoors for offline maps, custom screens, and better interval training.

Activating Sports Modes on Samsung Galaxy Watch (Watch 8, Ultra, FE)

Samsung’s Galaxy Watch series shines for Android users with over 100 modes on newer models and seamless Samsung Health integration.

Steps to start:

  1. Swipe up to apps, open Samsung Health.
  2. Tap “Exercise” or “Work out.”
  3. Select mode (running, cycling, swimming, strength, etc.).
  4. Tap start—countdown begins; permissions for GPS/heart rate auto-prompt.
  5. During: Swipe to see stats like pace, heart rate zones, route map.
  6. End and save—auto-syncs to phone.

Standout modes:

  • Running: Auto lap detection, race predictor, personalized coaching.
  • Swimming: Detects strokes, SWOLF, pool length auto-set.
  • Strength: Counts reps/sets in some exercises.
  • Golf: Partners with apps for course maps.
  • Track Run: Lane-specific distance on 400m tracks.

Galaxy Watch excels at auto-detection for common activities. Enable in Samsung Health > Settings > Workout detection.

Battery-saving tip: Use “Continuous heart rate” only during workouts to extend life.

Garmin Watches: The King of Sports Modes (Venu 4, Fenix 8, Forerunner series)

Garmin dominates serious training with 80–100+ profiles, deep metrics, and exceptional battery life.

To use:

  1. Press start button (usually top-right).
  2. Scroll to activity (run, bike, swim, triathlon, etc.).
  3. Select and start—GPS locks quickly on most models.
  4. Customize data fields via Garmin Connect app or watch settings.
  5. During: Glances show pace, power, VO2 max estimate, etc.
  6. End activity—review summary on watch or sync to Connect.

Highlights:

  • Run: Advanced dynamics (cadence, vertical oscillation, ground contact).
  • Multisport: Auto-transitions for triathlons/duathlons.
  • Strength: Animated workouts, rep counting.
  • Ski/Snowboard: Tracks runs, vertical drop.
  • Body Battery/Training Readiness: Guides when to push or rest.

Garmin’s edge: Long battery (weeks on some), offline maps, ClimbPro for elevation planning, and integration with power meters/cadence sensors.

Fitbit Devices: Simple Yet Effective Modes (Charge 6, Versa 4, Sense 2+)

Fitbit focuses on approachable tracking with 40+ modes.

Setup:

  1. Open Exercise app on watch or Fitbit app on phone.
  2. Choose activity.
  3. Start tracking—heart rate, calories, Active Zone Minutes (time in fat-burn/cardio/peak zones).
  4. For premium users: Daily Readiness Score influences mode suggestions.

Popular ones:

  • Run: GPS on models with it, pace alerts.
  • HIIT/Strength: Zone tracking for intensity.
  • Swim: Basic lap counting.
  • Yoga: Calm metrics focus.

Fitbit integrates well with Google ecosystem for broader insights.

Tips for Getting the Most Accurate Data from Any Sports Mode

Accuracy matters—here’s how to optimize:

  • Wear snugly (one finger above wrist bone) for heart rate.
  • Update firmware regularly for sensor improvements.
  • Calibrate GPS outdoors first (run/walk 10-15 mins).
  • For swimming: Set pool length correctly.
  • Use chest straps for max HR precision in intense sessions.
  • Enable auto-pause for breaks.
  • Review trends weekly in companion apps, not single sessions.
  • Pair with external sensors (bike power, foot pods) on compatible watches.

Benefits: Users see 10-20% better consistency in training when using modes properly.

Comparing Sports Modes Across Brands in 2026

  • Apple Watch: Best ecosystem integration, intuitive UI, great for casual to intermediate. Limited battery for ultra-long events. ~50 modes.
  • Samsung Galaxy Watch: Versatile for Android, 100+ modes, strong auto-detection and coaching. Solid but not Garmin-level depth.
  • Garmin: Unmatched for multisport/endurance—advanced metrics, battery, customization. Steeper learning curve.
  • Fitbit: Easiest entry, focuses on zones/motivation. Fewer modes but excellent for general fitness.

Pick based on phone (iOS → Apple; Android → Samsung/Garmin/Fitbit) and goals (casual → Apple/Fitbit; serious training → Garmin).

Common Challenges and Fixes

  • GPS drift: Move to open area for lock.
  • Battery drain: Disable always-on display during workouts.
  • Overwhelm from data: Start with basic screens, add complexity later.
  • Inaccurate HR: Clean sensor, avoid loose fit/tattoos.

Real Stories from Everyday Users

Runners love Garmin’s pace alerts for PRs. Triathletes praise multisport transitions. Gym-goers appreciate auto rep counting on Samsung/Garmin. Casual walkers find Apple’s rings motivating. One user switched from basic tracking to structured modes and dropped 10 minutes off their 10K time.

Level Up Your Training Today

Sports modes turn your smartwatch into a personal coach. Start simple—pick one activity, enable the mode, track consistently. Over time, dive into advanced features like zones, recovery, and coaching.

Grab your watch, choose a mode, and get moving. Your best workout is waiting.

Why Your Smart watch Won’t Connect to Your Phone: The Most Common Reasons and Fixes

Few things are more frustrating than unboxing a shiny new smart watch only to spend the next hour staring at a “Disconnected” or “Pairing Failed” message. In 2026, Bluetooth technology is mature, companion apps are smarter, and initial pairing usually takes under two minutes—yet connection problems remain one of the top support tickets for every major brand. The good news? Almost every failure falls into one of a handful of repeatable categories, and most can be fixed in under five minutes once you know where to look.

This article breaks down the twelve most common reasons smartwatches fail to connect (or stay connected) to phones in 2026, with real-world examples from Apple Watch, Galaxy Watch, Pixel Watch, Huawei GT series, Amazfit, and others. For each issue you’ll get clear symptoms, why it happens, and step-by-step fixes that work on both iOS and Android. By the end you’ll be able to diagnose almost any pairing or drop-out problem yourself—no factory resets required in 95% of cases.

1. Bluetooth Is Turned Off or Not Discoverable

Symptoms Watch doesn’t appear in the pairing list at all, or phone says “No devices found”.

Why it happens The watch must be in active pairing/discovery mode (usually automatic on first boot), and the phone’s Bluetooth radio must be on and scanning.

Fixes

  • On phone: Control Center / Quick Settings → toggle Bluetooth off → wait 5 seconds → toggle back on.
  • On watch: Power cycle (hold power button 10–15 s until restart). Most models re-enter pairing mode on reboot.
  • iPhone extra: Settings → Bluetooth → make sure “Bluetooth” is green and scanning.
  • Android extra: Settings → Connected devices → Connection preferences → Bluetooth → ensure “Visible to nearby devices” or scanning is active.

Pro tip: Turn off nearby Bluetooth speakers/headphones—they can “steal” the discovery slot.

2. Location / GPS Permissions Are Denied or Set to “While Using”

Symptoms Pairing starts but fails at “Connecting…” or watch shows “Location required” prompt.

Why it happens Since watchOS 10 / Wear OS 4 (2023 onward), precise location is required during initial pairing for secure Bluetooth LE handshakes and to set time zone / regional features automatically.

Fixes

  • iPhone: Settings → Privacy & Security → Location Services → Watch app (or Galaxy Wearable / Huawei Health / Zepp etc.) → set to “Always”.
  • Android: Settings → Location → App permissions → [companion app] → Allow all the time + Precise location.
  • After changing, force-close companion app, reopen, and retry pairing.

Many 2026 users miss this because older guides say “location optional”—it’s not anymore.

3. Companion App Lacks Background / Unrestricted Battery Permission

Symptoms Pairs successfully but disconnects the moment the phone screen turns off or after 5–10 minutes.

Why it happens Android 14–16 aggressive Doze mode and iOS background refresh restrictions kill the companion app when it’s not “foreground”. The watch relies on periodic pings to stay connected.

Fixes – Android Settings → Apps → [Galaxy Wearable / Pixel Watch / Huawei Health / Zepp / etc.] → Battery → set to “Unrestricted” or “Allow background activity”. Also: Settings → Battery → App battery usage → disable “Adaptive Battery” for the app.

Fixes – iOS Settings → General → Background App Refresh → set to Wi-Fi or Wi-Fi & Cellular. Settings → [Watch app] → allow Background App Refresh.

After changes, restart phone and watch.

4. Outdated Companion App or Watch Firmware

Symptoms Pairing freezes at 30–50%, error “Incompatible version”, or connects but features (notifications, calls) don’t work.

Why it happens New watches ship with firmware expecting the latest companion app; old apps don’t understand new Bluetooth profiles or security handshakes.

Fixes

  • Update companion app via App Store / Google Play (force refresh by pulling down).
  • If watch partially connects: open companion app → look for “Update watch” or “Firmware check” → install.
  • No connection at all? Borrow a compatible phone to update watch firmware first, then re-pair to your device.

Rule of thumb in 2026: never try to pair a brand-new watch without updating the companion app first.

5. Previous Pairing / Activation Lock Remains

Symptoms “Activation Lock”, “This Apple Watch is linked to another Apple ID”, or “Device already paired” errors.

Why it happens Apple Watches especially remember the last owner’s iCloud; many Android watches remember the last Bluetooth MAC.

Fixes – Apple Watch Previous owner must: iCloud.com → Find My → Devices → remove the watch. If you own it: Watch app → My Watch → All Watches → tap “i” next to watch → “Unpair Apple Watch” (even if not connected).

Fixes – Android watches Watch settings → Connections / General → “Disconnect” or “Reset network settings”. Worst case: factory reset watch (hold power + lower button usually) → re-pair as new.

6. Interference from Other Bluetooth Devices

Symptoms Pairing starts but repeatedly fails, or connects but drops every 30–60 seconds.

Why it happens 2.4 GHz band overcrowding: Wi-Fi routers, wireless mice/keyboards, Bluetooth speakers, smart home hubs, Fitbit/older Garmin nearby.

Fixes

  • Move phone and watch to a different room away from router/speakers.
  • Temporarily turn off nearby Bluetooth devices (especially audio devices).
  • On phone: Settings → Wi-Fi → choose 5 GHz band if available (reduces 2.4 GHz congestion).
  • After pairing succeeds, most watches switch to dedicated LE channels and become more tolerant.

7. Airplane Mode or Low-Power Mode Left On

Symptoms Watch stuck on “Searching…” or phone never sees it.

Why it happens Airplane mode disables Bluetooth radio; Low Power Mode on iPhone or Extreme Battery Saver on Android severely limit scanning.

Fixes

  • Turn off Airplane Mode on both devices.
  • iPhone: Control Center → disable Low Power Mode (yellow battery icon).
  • Android: Quick Settings → disable Battery Saver / Extreme Battery Saver.

8. Wrong Regional / Language Settings Mismatch

Symptoms Pairing succeeds but time zone wrong, notifications in wrong language, or certain features grayed out.

Why it happens Some 2026 watches (especially Huawei, Amazfit global versions) lock features by region during first sync.

Fixes

  • Set phone region/language to match intended market before pairing.
  • After pairing: watch settings → General / System → Language & region → match phone.
  • Huawei extra: Huawei Health → Me → Region → change if needed (may require re-pair).

9. Insufficient Storage on Watch for Initial Sync

Symptoms Update or sync fails at 70–90% with “Not enough storage” or “Installation failed”.

Why it happens First sync downloads full watchOS/Wear OS/HarmonyOS + default apps (1–3 GB).

Fixes

  • Companion app → watch storage → delete unused watch faces/apps.
  • Factory reset as last resort (loses nothing if new).
  • Pair with strong Wi-Fi—some watches can offload temp files better.

10. VPN, Firewall, or Security Apps Blocking

Symptoms Pairing never starts or drops instantly.

Why it happens VPNs route Bluetooth traffic oddly; some antivirus/firewall apps block local device discovery.

Fixes

  • Disable VPN completely during pairing.
  • Pause / uninstall third-party security apps (e.g., Avast, Norton, GlassWire) temporarily.
  • After successful pairing, re-enable—most only interfere during discovery.

11. Corrupted Bluetooth Cache / Pairing Records

Symptoms Watch appears but pairing loops or “Failed to connect” every time.

Fixes – iPhone Settings → Bluetooth → tap “i” next to watch → Forget This Device → restart phone → re-pair.

Fixes – Android Settings → Connected devices → Previously connected → tap watch → Forget → restart Bluetooth → re-pair.

Also clear cache: Settings → Apps → [companion app] → Storage → Clear cache (not data—data clears settings).

12. Hardware / Manufacturing Defects (Rare but Real)

Symptoms Every fix above fails; watch never enters pairing mode or Bluetooth icon grayed out.

Fixes

  • Test watch on another phone (borrow family member’s). If works → problem is your phone.
  • If fails on multiple phones → return / warranty claim (most brands offer 1-year hardware coverage in 2026).
  • Apple extra: Genius Bar diagnostic can confirm Bluetooth radio failure.

Quick Diagnostic Flowchart (Memorize This)

  1. Bluetooth on both? → Yes → 2
  2. Location “Always” for companion app? → Yes → 3
  3. Battery ≥50% & not in Low Power / Airplane? → Yes → 4
  4. Companion app & firmware latest? → Yes → 5
  5. Forget device in Bluetooth settings & re-pair? → Yes → 6
  6. Disable VPN/security apps? → Yes → 7
  7. Try different room / turn off nearby Bluetooth devices? → Still fails → warranty / borrow another phone to test.

Connection failures in 2026 are rarely “the watch is broken.” They’re almost always permissions, background restrictions, outdated software, or environmental interference. The single biggest time-saver is doing the preparation checklist before you even power on the watch.

Next time you see “Disconnected” or “Pairing failed,” run through the list above instead of immediately resetting. Nine times out of ten you’ll be back online in minutes, with notifications buzzing reliably and health data flowing smoothly. A stable connection turns a good smartwatch into a great one—enjoy the upgrade.

Pairing Your Smart watch to a Smartphone: The Ultimate 2026 Step-by-Step Guide

Getting a new smart watch is exciting—until the moment you realize it needs to talk to your phone to unlock its full potential. Notifications, health data sync, app installs, firmware updates, music controls, payments, and even standalone calls all depend on that initial (and sometimes ongoing) connection. In 2026, pairing has become smoother than ever with better Bluetooth 5.3/LE support, faster initial syncs, and companion apps that guide you almost automatically. But cross-platform quirks, Bluetooth gremlins, and model-specific steps still trip people up.

Whether you’re setting up an Apple Watch Series 11 with your iPhone 16, a Samsung Galaxy Watch 8 with a Pixel 10 Pro, a Huawei GT 5 Pro with an Android foldable, or trying to make an older Wear OS watch play nice with a new device.

Why Pairing Is the Make-or-Break Step in 2026

Smartwatches are no longer standalone gadgets. They’re extensions of your phone:

  • Notifications & replies flow over Bluetooth.
  • Health & fitness data syncs to apps like Apple Health, Samsung Health, Google Fit, or Huawei Health for trends and insights.
  • Firmware & app updates download through the phone.
  • Payments & calls use phone credentials or eSIM bridging.
  • Location & AI features (e.g., offline maps, workout coaching) rely on shared data.

A failed or unstable pairing means a dumb watch—time, basic steps, maybe heart rate, but no smarts. In 2026, most flagships use Bluetooth Low Energy (BLE) for efficiency and add Wi-Fi fallback for larger downloads, but the initial handshake is still Bluetooth. Range is typically 10–30 meters line-of-sight, but walls, interference from other devices, or low battery can kill it.

Before You Start: Prep Checklist

  • Charge both devices to at least 50% (watch often ships low).
  • Update phone OS: iOS 19+ for Apple Watch Series 11/Ultra 3/SE 3; Android 14+ (preferably 15) for Wear OS 6+ devices.
  • Enable Bluetooth & Location on phone (Location needed for initial pairing on many models).
  • Turn off any VPNs or battery optimizers that kill background processes.
  • Have the companion app ready (download in advance if possible).
  • Clear space: Watch needs ~500 MB–2 GB free for initial sync.
  • Know your watch model—steps vary slightly between series.

Pairing an Apple Watch (Series 11, Ultra 3, SE 3) – iPhone Only (Native)

Apple keeps it locked to iPhone—no native Android support in 2026.

  1. Charge & power on the Apple Watch (press/hold side button until Apple logo).
  2. Open Watch app on iPhone (auto-installs if missing).
  3. Tap “All Watches” → “Add Watch” or “Pair New Watch” on fresh setup.
  4. Hold watch face to iPhone camera—align swirling animation in viewfinder (or tap “Pair Apple Watch Manually” if camera fails).
  5. Follow prompts: Set wrist preference (left/right), choose setup as new or restore backup, agree to terms.
  6. Sign in with Apple ID, set passcode (or skip for now), enable features (Siri, location, health permissions).
  7. Wait for sync—watch downloads watchOS (if update needed), apps, settings (10–30 min typical). Keep devices close and charging.
  8. Done—watch restarts, shows your watch face. Notifications start flowing.

Troubleshooting: Camera won’t scan? Use manual pairing. Stuck on “Updating”? Force restart watch (hold crown + side button until logo). No sync? Toggle Bluetooth, restart iPhone, ensure iCloud signed in.

Pairing Samsung Galaxy Watch (Watch 8 series, Ultra, FE) – Android (Best with Samsung Phones)

Works with most Android 11+ phones, but smoothest on Galaxy devices.

  1. Charge & power on watch (hold top button).
  2. Download Galaxy Wearable from Google Play (or Galaxy Store on Samsung phones).
  3. Open app → “Start the journey” or “Add new device”.
  4. Select Galaxy Watch → watch enters pairing mode (shows Bluetooth name).
  5. Confirm pairing code on both screens if shown.
  6. Sign in Samsung account (required for Health, Pay, full features).
  7. Grant permissions (notifications, contacts, location, storage).
  8. Choose backup/restore if upgrading, or set as new.
  9. Wait for initial sync—firmware update, watch faces, apps (can take 15–40 min).
  10. Customize—set wrist, notifications mirror, install apps via Play Store on watch.

To switch phones: On old watch → Settings → General → Connect to new phone (resets watch), then pair to new device.

Troubleshooting: Fails on Pixel 10 series? Known 2025–2026 bug—pair to any non-Pixel Android first (even borrow one), complete setup, then transfer to Pixel. App crashes? Clear cache/storage for Galaxy Wearable, update app.

Pairing Google Pixel Watch (4 or later) – Android

Uses Wear OS 6+ with Fitbit integration.

  1. Charge & power on watch.
  2. Download Pixel Watch app (or use Fitbit app for health setup) from Play Store.
  3. Open app → Set up or “Pair with watch”.
  4. Put watch in pairing mode (it prompts automatically).
  5. Confirm code on both.
  6. Sign in Google account.
  7. Set up Fitbit for advanced health (Daily Readiness, etc.)—grant permissions.
  8. Choose wrist, enable features (notifications, location, calls).
  9. Sync—downloads Wear OS update if needed, apps, settings (10–25 min).
  10. Customize—tiles, complications, Google Wallet.

Multiple watches? Pair as many as you want—one phone supports several, but only one active at a time per account.

Troubleshooting: Sync stuck? Restart both, toggle Bluetooth, ensure no VPN. Fitbit login fails? Check Google account sync.

Pairing Huawei Watches (GT 5 Pro, Watch 5 series) – Android (HarmonyOS)

  1. Charge & power on watch.
  2. Download Huawei Health from AppGallery or Play Store (global version).
  3. Open app → Devices → Add.
  4. Select watch model → watch shows pairing code/QR.
  5. Scan/confirm on phone.
  6. Grant permissions (Bluetooth, location, notifications, storage).
  7. Sign in Huawei ID (optional but unlocks cloud sync).
  8. Sync—firmware, watch faces, health data (fast on HarmonyOS).
  9. Customize—TruSeen settings, workout modes.

Global users: Some features delayed vs China version.

Troubleshooting: App not finding watch? Enable location precisely, restart Bluetooth.

Cross-Platform Pairing Workarounds (2026 Reality)

  • Apple Watch on Android: No native way—requires initial iPhone setup for activation/eSIM. Workarounds like Merge app or hacks give partial function (notifications, basic tracking) via Bluetooth bridge, but no apps, updates, or full health sync. Not recommended long-term.
  • Galaxy Watch / Pixel Watch on iPhone: Merge app (2026 version) bridges Wear OS to iOS—pair via Merge on iPhone + watch, get notifications, some health sync. Limited—no full Samsung Health or Google Fit depth.
  • General tip: Stick to native ecosystem for best experience.

Keeping the Connection Stable Long-Term

  • Keep Bluetooth on, location enabled (for initial reconnect).
  • Avoid aggressive battery savers killing companion app.
  • Update companion app & watch firmware regularly.
  • Restart devices weekly if drops frequent.
  • Forget & re-pair if persistent issues (backup first).
  • Interference fixes: Move away from Wi-Fi routers, microwaves, other BLE devices.

Pairing takes 5–30 minutes the first time, but once done, it’s mostly set-and-forget. In 2026, reliable connections mean your watch becomes truly useful—real-time alerts, accurate tracking, seamless payments. Take it slow during setup, grant all requested permissions, and you’ll have a wrist companion that feels like part of your phone.

Calibrating Time and Date on Your Smart watch

Setting the time and date on a smart watch seems like the simplest thing in the world—until it’s wrong. Maybe your watch is showing yesterday after a long flight, or it’s stubbornly stuck on the wrong time zone despite being paired to your phone. In 2026, with smartwatches handling everything from global alarms and world clocks to health reminders tied to specific hours, having the correct time isn’t optional—it’s essential for reliable notifications, accurate workout logging, sleep cycle analysis, and even features like medication reminders or shift-work schedules.

Most modern smartwatches pull time automatically from your paired phone via Bluetooth or cellular, using network time protocol (NTP) for precision down to the second. But glitches happen: Bluetooth drops during travel, software updates reset settings, standalone mode kicks in, or you simply want to trick the clock ahead for an early meeting.

Why “Calibration” Matters More Than You Think

“Calibration” here really means ensuring the watch’s internal clock matches real-world time. Unlike mechanical watches that drift seconds per day, smartwatches are digital and should be dead accurate when synced. But unsynced time creates cascading issues:

  • Notifications arrive late or early.
  • Alarms ring at the wrong hour.
  • Sleep tracking misattributes bedtime.
  • Workout start times log incorrectly in apps like Strava or Apple Fitness.
  • World clock complications show nonsense.
  • Features like sunrise/sunset widgets or UV alerts misfire.

In 2026, many watches add “intentional offset” options (e.g., Apple’s +0 min trick) for people who habitually set clocks fast to avoid being late. Others let you force manual mode for offline use. Understanding both auto and manual paths prevents frustration.

Automatic Sync: The Default (and Best) Method

Virtually every smartwatch in 2026 defaults to automatic time from your phone:

  • Apple Watch (Series 11, Ultra 3, SE 3): Syncs instantly with iPhone’s General → Date & Time → Set Automatically (uses cellular/Wi-Fi/network time). No manual date/time setting exists—only +0 min offset up to 1 hour for “fast clock” habits.
  • Samsung Galaxy Watch (Watch 8 series, FE): Via Galaxy Wearable app or direct Bluetooth—pulls from phone’s network time. When connected, manual options gray out. Standalone (no phone nearby) allows full manual set.
  • Google Pixel Watch (4 or later): Uses Fitbit/Google app sync or direct Wear OS settings. Automatic date/time and time zone on by default; disable for manual tweaks.
  • Huawei (GT 5 Pro, Watch 5 series): Huawei Health app syncs phone time/language. 24-hour toggle in watch settings; manual rare unless disconnected.
  • Garmin (Venu 4, Fenix 8): Garmin Connect app sync; supports GPS time sync on outdoor models for ultra-precision.

Pro tip: Ensure phone has “Set time automatically” enabled (Android: Settings → System → Date & time; iOS: Settings → General → Date & Time). Airplane mode or poor signal can delay sync—reconnect Bluetooth/Wi-Fi to force refresh.

Manual Time and Date Adjustment – Step by Step

When auto fails (travel, standalone use, testing), go manual.

Apple Watch (watchOS 12+) Apple doesn’t allow full manual date/time—only offset.

  1. On watch: Settings → Clock → +0 min.
  2. Rotate Digital Crown to add up to +59 minutes (e.g., +15 min for “I’m always late”).
  3. Real alarms, notifications, and Health data stay on actual time—only face shows offset.
  4. To reset: Set back to +0 min. For full sync issues: Fix on iPhone first (turn Set Automatically on/off), restart both devices, or unpair/repair via Watch app.

Samsung Galaxy Watch (Wear OS 6+ / One UI Watch 8+) Connected: Auto only. Standalone/manual:

  1. Swipe up → Settings → General → Date & time.
  2. Turn off Automatic.
  3. Tap Set date → scroll/select month/day/year → Done.
  4. Tap Set time → adjust hour/minute/AM-PM → Done.
  5. Tap Select time zone → choose city/zone.
  6. For 24-hour: Change on phone (Settings → System → Date & time → Use 24-hour format). Reconnect to phone to resume auto.

Google Pixel Watch (Wear OS 6+)

  1. Press crown → Settings → System → Date & time.
  2. Turn off Automatic date & time.
  3. Tap Set date → scroll/adjust → confirm.
  4. Tap Set time → adjust → confirm.
  5. Turn off Automatic time zone → tap Time zone → select.
  6. 24-hour format follows phone or Wear OS regional settings. Restart watch after changes.

Huawei HarmonyOS Watches (GT 5/Watch 5 series)

  1. Huawei Health app on phone → device settings → sync time (auto default).
  2. On watch: Settings → System & updates → Date & time.
  3. Toggle 24 Hours on/off. Manual rare—usually disconnect phone, then adjust via watch if needed (similar to Wear OS: set date/time manually). Changes sync back when reconnected.

Other Brands (Garmin, Amazfit/Zepp, Fitbit)

  • Garmin: Garmin Connect app → device → System → Time → Sync with phone or GPS. Manual offset in some models.
  • Amazfit/Zepp: Zepp app → Profile → device → Time format/sync.
  • Fitbit (Charge 6/Pixel integration): Fitbit app → device settings → Time zone/sync.

Time Zone and Format Tweaks

Traveling?

  • Auto time zone usually works via phone GPS/network.
  • Manual: Disable auto time zone, pick new zone (e.g., GMT+8 for Hong Kong).
  • Dual-zone: Use world clock complications (Apple: add World Clock; Samsung: add complication; Pixel: Tiles). 24/12-hour: Almost always mirrors phone—change phone setting to propagate.

Troubleshooting When Time Won’t Update

  1. Force sync: Toggle Bluetooth off/on, restart phone/watch.
  2. Check connection: Ensure companion app running/background allowed.
  3. Update everything: Latest watchOS/Wear OS/HarmonyOS/firmware + companion app.
  4. Standalone reset: Power cycle watch, re-pair if needed.
  5. Network issues: Poor signal? Connect to Wi-Fi (many watches support).
  6. Buggy update: Rare, but factory reset as last resort (back up first).
  7. Offset stuck: Apple users—double-check +0 min is zeroed.

Advanced Tips for 2026 Users

  • Intentional fast clock: Apple’s +0 min is popular for chronic lateness—set +10 min, alarms still real-time.
  • Offline adventures: Hikers/divers—set manual before losing signal; some Garmin models use GPS time sync.
  • Multiple watches: Rotate? Each syncs independently to phone.
  • Privacy note: Time sync uses location/network—fine for most, but airplane mode disables until re-enabled.

Getting time and date right takes seconds but saves headaches all day. In 2026, with smarter AI reminders and global features, accurate time is the foundation everything else builds on.

The One Thing You Never Clean on Your Smart watch (But Absolutely Should)

Let me paint a picture for you. It’s the end of a long day, and you finally take off your smart watch. You set it on the nightstand, maybe give the screen a quick wipe if it’s looking smudgy, and you go about your evening. You’ve tracked your steps, your heart rate, your sleep, and you feel good about all that data. But there’s a part of your watch that has been working just as hard as the sensors and the screen, collecting something you probably don’t want to think about. It’s the band. That strip of material wrapped around your wrist has been soaking up everything your body has released for the past sixteen hours. Every drop of sweat, every flake of dead skin, every microscopic trace of lotion, sunscreen, and hand sanitizer has found a home in the fibers or on the surface of your watch band. And if you’re like the vast majority of people, you haven’t cleaned it. Not really. Not properly.

Here is the uncomfortable truth that researchers have been quietly documenting for years. A study conducted in 2023 examined twenty different smartwatch wristbands and found that a staggering ninety-five percent of them were contaminated with bacteria. Not just harmless skin bacteria either. We’re talking about Staphylococcus, which can cause everything from minor skin infections to more serious illness in vulnerable people, and Pseudomonas, another genus known for its resilience and ability to cause infections. But the statistic that really makes you stop and think is this: sixty percent of those tested wristbands harbored E. coli. That’s right. The bacteria associated with food poisoning and fecal contamination was living on more than half of the watches people wear every single day. Think about that the next time you’re preparing a sandwich with your watch still on your wrist.

The problem is not that we’re dirty people. The problem is that we simply don’t think about the band. We obsess over screen protectors and charging cables and software updates, but the part of the device that has the most intimate contact with our bodies gets ignored. And it’s not just about bacteria. Your watch band is subjected to an astonishing amount of abuse. It gets rubbed against desks and countertops. It gets splashed with coffee and dragged through sleeves. It gets coated in the invisible film of oils that your skin produces naturally. Over time, this accumulation doesn’t just become a health concern; it physically degrades the band itself. Sweat salts crystallize and act like sandpaper on coatings. Skin oils break down adhesives and cause materials to become brittle. Sunscreen, ironically the very thing protecting your skin, can chemically react with certain band materials and cause permanent discoloration or structural weakness.

The health implications go beyond the gross factor. Dermatologists have long documented a condition sometimes called “smartwatch dermatitis,” though the medical term is more specific. When you wear a dirty band day after day, you create a perfect storm for skin problems. The warm, moist environment under the band is exactly what bacteria and fungi need to thrive. Add in the friction of the band moving against your skin, and you have a recipe for something called contact dermatitis. This shows up as red, itchy, sometimes painful rashes that can take days to clear up even after you stop wearing the watch. In more severe cases, the hair follicles on your wrist can become infected, leading to folliculitis, which looks like small pimples and can be surprisingly uncomfortable. For people with compromised immune systems, or for anyone who spends time in healthcare settings, these risks are even more serious. The bacteria living on your band don’t stay on your band. They transfer to your hands, and from your hands to everything you touch.

The good news in all of this is that the solution is almost absurdly simple. You don’t need expensive equipment or special chemicals. You just need to know what you’re dealing with and develop a simple habit. But before we get into the how, we have to understand that not all bands are created equal. The material of your band determines everything about how you should clean it. A silicone band from a fitness tracker is a completely different beast from a leather band on a dress smartwatch, and treating them the same way is a fast track to ruining them.

Let’s start with the most common material you’ll find on fitness-focused devices: silicone and rubber. These bands are durable, flexible, and designed to handle sweat. They’re also, surprisingly, quite porous at a microscopic level. That means they actually absorb oils and sweat over time, which is why they can develop that stubborn odor that seems impossible to wash out. To clean a silicone or rubber band properly, you need to remove it from the watch first. This is non-negotiable. Leaving it attached while you clean invites moisture into the speaker grilles and charging contacts of your watch itself. Once the band is off, rinse it under warm running water to remove any loose debris. Then apply a small amount of mild, hypoallergenic hand soap to a soft cloth or directly to your fingers. Gently work the soap over the entire surface of the band, paying special attention to the areas where sweat pools, usually the underside and the spots near the lugs. If you have stubborn grime built up in the crevices, a soft-bristled toothbrush used with gentle circular motions can work wonders without scratching the material. Rinse the band thoroughly under clean running water until every trace of soap is gone, because soap residue left on the band can actually cause skin irritation when you wear it again. Pat the band dry with a lint-free cloth and then let it air dry completely before reattaching it to your watch. This usually takes an hour or two, but it’s worth the wait.

If you need to disinfect a silicone or rubber band, perhaps after being sick or after using your watch in a healthcare environment, both Apple and Garmin officially approve the use of seventy percent isopropyl alcohol wipes. Simply wipe the band down thoroughly, and then, crucially, rinse it with water afterward. This last step is important because the chemical residue from the alcohol wipe can be irritating to skin if it’s left to dry on the band. For those persistent odors that seem to survive regular washing, a short soak in diluted white vinegar for ten to fifteen minutes, followed by a thorough rinse, can neutralize the bacteria causing the smell without damaging the material.

Moving on to metal bands, which include stainless steel, titanium, and aluminum options. These bands tend to harbor fewer bacteria than porous materials simply because they’re less absorbent. But they have their own unique challenge. The links in metal bands are tiny traps for dead skin cells and dirt. Over time, this buildup can make the band feel gritty and look dull. To clean a metal band, you should also remove it from the watch if possible. Prepare a small bowl of warm water with a few drops of mild dish soap. Let the band soak for five to ten minutes to loosen the accumulated grime. Then take a soft toothbrush and gently scrub between each link, paying attention to the clasp mechanism where oils and dead skin really like to collect. Rinse the band thoroughly under clean running water, and here’s the crucial part: dry it immediately with a soft, lint-free cloth. Metal, especially stainless steel, can develop water spots if you let it air dry. After drying, let it sit for a while to ensure no moisture is trapped in the link mechanism before you reattach it to your watch. For disinfection, seventy percent isopropyl alcohol wipes are safe for metal bands, and unlike with silicone, you may not need to rinse afterward, though checking your manufacturer’s specific guidance is always wise. One thing you should never do is use metal polish or abrasive cleaners on your watch band. These products are designed for jewelry and cookware, not for the delicate coatings on smartwatch bands, and they can scratch and discolor the finish permanently.

Leather bands are in a category all by themselves. They are beautiful, they develop a unique patina over time, and they require the most careful handling of any band material. The single most important thing to know about leather is that it is not water-resistant. Water is the enemy of leather. It causes it to dry out, crack, and discolor. If you wear a leather band during a workout or get caught in the rain, you are shortening its life. To clean a leather band, you must remove it from the watch immediately if it gets wet, and you must never intentionally soak it. The cleaning method for leather is minimal by design. Use a dry, soft, lint-free cloth to wipe away any surface dust. If you need to address a spot, lightly dampen a corner of the cloth with fresh water. It should be barely moist, not wet. Gently wipe the leather surface, and then immediately use a dry part of the cloth to blot away any moisture. Then let the band air dry completely at room temperature, away from direct sunlight and heat sources like radiators. Some people like to use leather conditioner to keep the material supple, and a small amount of conditioner designed specifically for watch bands can be beneficial, but this is optional. What you must never do is use alcohol wipes or any kind of disinfectant on leather. These products strip the natural oils from leather, causing it to become brittle and crack. You also must never store leather bands in humid environments. If you sweat heavily, a leather band may simply not be the right choice for you, and that’s okay. It’s better to accept that limitation than to ruin an expensive band.

Fabric bands, which include nylon sports loops, trail loops, and traditional NATO straps, are the most comfortable and breathable options, but they are also the most absorbent. They soak up sweat and oils like a sponge, which means they can develop odors faster than any other material. Cleaning a fabric band is more involved, but still straightforward. Remove the band from your watch and prepare a bowl of warm water with a small amount of mild detergent or gentle hand soap. Submerge the band and let it soak for ten to fifteen minutes. Gently agitate the water with your hands to help loosen the dirt. If there are stubborn spots, use a soft-bristled brush to gently scrub those areas. Rinse the band thoroughly under clean running water until all soap is gone. Then pat it dry with a towel to remove excess moisture and lay it flat to air dry completely. This can take twenty-four hours or more, especially with thicker woven bands, so patience is required. Do not be tempted to speed up the process with a hairdryer or by placing it on a radiator. Heat can shrink or warp the fabric. For deep cleaning, some manufacturers have specific recommendations. Apple, for example, suggests for their FineWoven bands mixing one teaspoon of washing liquid with one cup of water, dipping a lint-free cloth in the solution, wringing it out slightly, and rubbing the band gently for one minute before wiping with a clean damp cloth and drying. For odors, adding a teaspoon of baking soda to the soak water or doing a final rinse with diluted white vinegar can help neutralize the bacteria that cause smells.

Now that you know how to clean each type of band, the question becomes how often you should do it. The answer depends entirely on your lifestyle. If you wear your watch daily and you exercise in it, you should be doing a quick clean weekly. This doesn’t have to be a production. After your workout, take the band off, rinse it under water if it’s silicone or fabric, wipe it down, and let it dry. That thirty-second habit will prevent the buildup that turns into stubborn grime. For a deeper clean, aim for once a month. This is when you do the full soap and water routine for silicone and fabric, the link scrubbing for metal, and the gentle wipe-down for leather. If you expose your band to specific things like salt water, sunscreen, or insect repellent, you should clean it immediately. These substances can be surprisingly corrosive to band materials, and leaving them on accelerates degradation.

There are also common mistakes that people make that can ruin a perfectly good band. The most frequent error is never removing the band from the watch before cleaning. This seems like a time-saver, but it’s a fast track to damaging your watch. Water and cleaning agents can seep into the speaker grilles, microphone, and charging contacts, leading to corrosion or malfunction. Another mistake is using harsh chemicals. Bleach, ammonia, and strong detergents will destroy your band, stripping protective coatings and causing colors to fade. Scrubbing too hard is another common error. Aggressive scrubbing with abrasive pads or stiff brushes will scratch metal, scuff silicone, and fray fabric. Gentle pressure is always more effective in the long run because it preserves the material while still removing the dirt. Putting the band back on too soon is a mistake that can cause skin irritation. A damp band is a breeding ground for bacteria and mold, and wearing it before it’s fully dry can trap moisture against your skin. Always wait until the band is completely dry.

Sometimes, no amount of cleaning can save a band. If you notice cracking or splitting, especially on silicone or rubber bands, it’s time for a replacement. These cracks can pinch your skin and they compromise the band’s durability. If your fabric band is fraying, with loose threads coming out, it’s weakening and could eventually break. If your metal band has a broken link or a clasp that no longer closes securely, don’t try to fix it yourself. Take it to a professional or replace it. And if your band has a persistent odor that won’t go away even after deep cleaning, the bacteria have likely penetrated the material itself, and it’s time to retire it.

Your smart watch band is the unsung workhorse of your wearable experience. It holds the device to your body day after day, through workouts, through work, through sleep. It deserves better than neglect. The ten minutes a month you spend cleaning it properly will pay dividends in longer band life, healthier skin, and the peace of mind that comes from knowing you’re not wearing a bacterial colony on your wrist. So tonight, when you take off your watch, pop that band off. Give it the attention it deserves.

Your First Smart watch: A Practical Beginner’s Guide to Getting Started in 2026

Unboxing a new smart watch feels exciting and a little overwhelming. There’s the sleek device, the charger, maybe a few bands, and suddenly you’re holding something that’s part timepiece, part fitness coach, part mini-phone. If this is your first time stepping into wearables, don’t worry—the learning curve flattens quickly once you get past the initial setup. In 2026, smartwatches like the Apple Watch Series 11, Samsung Galaxy Watch 8, Google Pixel Watch 4, and others have become incredibly polished, with better battery life, more accurate sensors, and features that actually feel useful day to day.

This guide walks you through everything a beginner needs: choosing the right model, unboxing and setup, essential first-week adjustments, core features to explore, common pitfalls to avoid, and tips to make the watch feel like a natural extension of your routine. Whether you’re coming from a basic fitness band or jumping straight from a traditional watch, these steps will help you get the most out of your new wrist companion without frustration.

Step 1: Before You Even Open the Box – Choosing the Right Watch

The biggest mistake new users make is buying on impulse without thinking about compatibility and priorities. In 2026, the ecosystem lock-in is stronger than ever.

If you have an iPhone (iOS 18 or later), the Apple Watch Series 11 or SE 3 remains the smoothest choice. It offers seamless pairing, the largest app library, and features like sleep apnea detection, hypertension notifications, and 24-hour battery life on recent models. Android users should lean toward Wear OS devices: the Google Pixel Watch 4 for clean Google integration and repairability, or the Samsung Galaxy Watch 8 for deeper health tools and longer promised software support.

Consider your main goals:

  • Fitness and serious training? Garmin Vivoactive 6 or Fenix series excel at multi-sport tracking and recovery insights.
  • Everyday notifications, payments, and calls? Apple or Samsung lead.
  • Budget under $200? Look at Amazfit Active 2, Fitbit Charge 6, or Samsung Galaxy Watch FE.
  • Long battery life? OnePlus Watch 3 or Huawei GT series often hit 5–10 days.

Check water resistance if you swim, and make sure the size fits your wrist—most brands offer 40–46mm ranges. Read recent reviews for 2026-specific updates like improved always-on displays or AI coaching.

Once you’ve decided, charge the watch fully before setup (most ship at 30–50%). This avoids interruptions during pairing.

Step 2: Unboxing and First Power-On

Take it slow. Remove the plastic films carefully—many people accidentally peel off protective screen layers. Plug in the charger (magnetic for Apple/Samsung/Pixel, pogo pins for some others) and let it reach 100%. This can take 1–2 hours.

Power on by pressing and holding the side button or crown until the logo appears. The watch will greet you in your language—swipe or rotate to select.

Step 3: Pairing with Your Phone – The Critical Step

Pairing is where most beginners hit snags, but it’s straightforward when done right.

For Apple Watch:

  • Open the Watch app on your iPhone (it auto-installs if needed).
  • Tap “Start Pairing” and hold the watch face over the iPhone camera to scan the animation (or pair manually).
  • Sign in with your Apple ID, set a passcode, choose wrist orientation, and decide on cellular setup if your model supports it.
  • The watch downloads watchOS updates and your settings—expect 10–30 minutes. Keep both devices close and charging.

For Samsung Galaxy Watch:

  • Download Galaxy Wearable from Google Play.
  • Open the app, tap “Start the journey,” and follow prompts to pair via Bluetooth.
  • Sign into Samsung account for full features like Samsung Health and Pay.
  • Choose watch face, restore from backup if upgrading, and enable notifications.

For Google Pixel Watch:

  • Use the Pixel Watch app (or Fitbit app for health sync).
  • Pair via Bluetooth, sign into Google account.
  • Set up Fitbit integration for advanced metrics like Daily Readiness.
  • Allow location and notifications for full functionality.

After pairing, the watch restarts a few times. This is normal—it’s syncing contacts, calendars, health permissions, and apps.

Step 4: First-Day Essentials – Make It Yours Quickly

Spend the first hour customizing so it doesn’t feel like a stranger on your wrist.

Watch faces: Swipe left/right or long-press to browse. Apple offers modular faces with complications (weather, activity rings, shortcuts). Samsung and Wear OS have thousands via the store—pick one with always-on support. Set favorite complications for quick glances: battery, steps, heart rate.

Notifications: Go to settings → Notifications. Mirror iPhone/Android alerts but disable low-priority ones (social spam) to avoid buzz overload. Enable quick replies for texts/calls.

Bands and fit: The watch should sit snug but not tight—one finger should slide under. Swap bands if needed (quick-release on most). Wear on non-dominant wrist for comfort during typing/exercise.

Permissions: Grant heart rate, location, microphone, contacts. This unlocks fitness tracking, maps, calls, and Find My.

Step 5: Core Features to Explore in Week One

Don’t overwhelm yourself—focus on these building blocks.

Activity and rings/goals: Apple’s rings (move, exercise, stand) motivate without nagging. Samsung/ Wear OS use steps + active minutes. Set realistic daily targets—start at 8,000 steps if you’re sedentary.

Heart rate monitoring: Enable continuous tracking. Check resting rate in morning—lower over time signals better fitness. During walks, compare watch data to perceived effort.

Sleep tracking: Wear to bed (comfortable bands help). Most 2026 models detect stages, SpO2, and breathing disturbances. Review in the morning—aim for consistent 7–9 hours.

Workouts: Start simple—outdoor walk/run with GPS. Auto-detect kicks in on many models. Post-workout, check heart zones and recovery advice.

Payments: Add cards to Apple Pay/Samsung Pay/Google Wallet. Double-click side button or gesture to pay—test at a store.

Notifications and calls: Reply with voice, scribble, or canned responses. Take calls on wrist if Bluetooth-connected.

Battery tips: First 2–3 days drain faster due to indexing/syncing. Normal life: 24–36 hours for Apple/Pixel, 40+ for Samsung, longer for others. Charge nightly or during shower.

Step 6: Useful Tweaks and Settings for Beginners

Always-on display: Enable if battery allows—glanceable time without raising wrist.

Theater/Silent mode: Swipe up control center → theater icon dims screen and silences haptics.

Do Not Disturb/Focus modes: Sync with phone or set watch-specific schedules.

Widgets/Stacks: Apple Smart Stack (rotate crown), Wear OS Tiles—add weather, calendar, shortcuts.

App installation: Browse watch app store or phone companion—start with weather, calculator, timers, music controls.

Privacy: Review health data sharing. Disable unnecessary location for apps.

Updates: Enable auto-updates for watchOS/Wear OS—new features like better AI insights roll out regularly.

Step 7: Common Beginner Mistakes and Fixes

  • Too tight/loose: Adjust band for accurate sensors.
  • Ignoring software updates: Miss bug fixes and features.
  • Overloading notifications: Mute apps aggressively.
  • Expecting phone-level battery: Wearables prioritize features over multi-day life.
  • Not restarting weekly: Clears glitches.
  • Skipping passcode: Risk if lost (but inconvenient for quick access).
  • Wearing 24/7 from day one: Skin needs breaks—remove occasionally.

Step 8: Building Habits – Making the Watch Work for You

Track one new thing weekly: week 1 steps, week 2 sleep, week 3 workouts. Use insights to adjust—earlier bedtime if REM low, more walks if sedentary hours high.

Explore third-party apps: Strava for cycling, Calm for mindfulness, WaterMinder for hydration reminders.

Customize complications/faces seasonally—motivational quotes in winter, UV index in summer.

Join communities: Reddit (r/AppleWatch, r/GalaxyWatch, r/PixelWatch) for tips and troubleshooting.

Your Watch, Your Way

A smart watch isn’t about having every feature—it’s about the few that quietly improve your day. In 2026, these devices are mature enough that setup takes under an hour, and real value emerges over weeks as you tweak and discover.

Give yourself grace the first month. Experiment, disable what annoys, enable what helps. Soon it’ll feel weird without the gentle tap of a notification or the satisfaction of closing activity rings. Welcome to the club—your wrist just got a lot smarter.

Back to Top
Product has been added to your cart
Compare (0)